Replacing excavator track shoes is a task that requires professional skills, appropriate tools, and a high emphasis on safety. It is generally recommended to be performed by experienced maintenance technicians. If you lack sufficient experience, it is strongly recommended to contact a professional repair service.
Below are the standard steps and important precautions for replacing excavator track shoes:
I. Preparation
Safety First!
Park the Machine: Park the excavator on level, solid ground.
Turn Off the Engine: Completely shut down the engine, remove the key, and store it safely to prevent accidental startup by others.
Release Hydraulic Pressure: Operate all control levers (boom, arm, bucket, swing, travel) several times to release residual pressure in the hydraulic system.
Set the Parking Brake: Ensure the parking brake is securely engaged.
Wear Personal Protective Equipment (PPE): Wear a safety helmet, safety glasses, anti-impact and anti-puncture work boots, and sturdy cut-resistant gloves .
Use Supports: When jacking up the excavator, you must use hydraulic jacks or stands with sufficient strength and quantity, and place sturdy sleepers or support blocks under the track. Never rely solely on the hydraulic system to support the excavator!
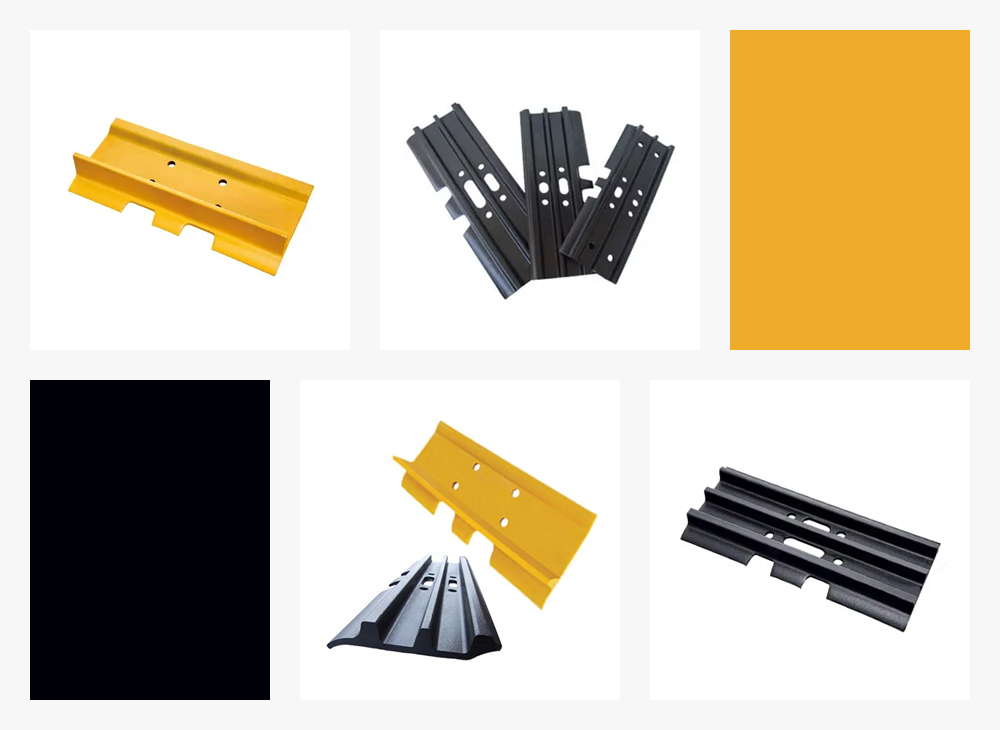
Identify Damage: Confirm the specific track shoe (link plate) that needs replacement and the quantity. Check adjacent track shoes, links (chain rails), pins, and bushings for wear or damage; replace them together if necessary.
Obtain Correct Spare Parts: Acquire new track shoes (link plates) that exactly match your excavator model and track specifications. Ensure the new plate matches the old one in pin pitch, width, height, grouser pattern, etc.
Prepare Tools:
Sledgehammer (recommended 8 lbs or heavier)
Pry bars (long and short)
Hydraulic jacks (with sufficient load capacity, at least 2)
Sturdy support blocks/sleepers
Oxy-acetylene torch or high-power heating equipment (for heating pins)
Heavy-duty socket wrenches or impact wrench
Tools for removing track pins (e.g., special punches, pin pullers)
Grease gun (for lubrication)
Rags, cleaning agent (for cleaning)
Protective earplugs (extreme noise during hammering)
II. Replacement Steps
Release Track Tension:
Locate the grease nipple (pressure relief valve) on the track tension cylinder, typically on the guide wheel (front idler) or tension cylinder.
Slowly loosen the grease nipple (usually 1/4 to 1/2 turn) to allow the grease to slowly seep out. Absolutely do not quickly or completely remove the grease nipple! Otherwise, high-pressure grease ejection can cause serious injury.
As grease is expelled, the track will gradually loosen. Observe the track sag until sufficient slack is obtained for disassembly. Tighten the grease nipple to prevent dirt entry.
Jack Up and Secure the Excavator:
Use hydraulic jacks to securely lift the side of the excavator where the track shoe needs replacement until the track is completely off the ground.
Immediately place sufficiently strong support blocks or sleepers under the frame to ensure the machine is firmly supported. Jack stands are not safe supports! Recheck that the supports are secure and reliable.
Remove the Old Track Shoe:
Locate Connection Pins: Identify the positions of the connecting pins on both sides of the track shoe to be replaced. Typically, choose to disconnect the track at the two pin locations connecting this shoe.
Heat the Pin (Usually Required): Use an oxy-acetylene torch or other high-power heating equipment to evenly heat the end of the pin to be removed (usually the exposed end). Heating aims to expand the metal and break its interference fit and possible rust with the bushing. Heat to a dull red color (approx. 600-700°C), avoiding overheating to melt the metal. This step requires professional skill; avoid burns and fire hazards.
Drive Out the Pin:
Align the punch (or special pin puller) with the center of the heated pin.
Use a sledgehammer to forcibly and accurately strike the punch, driving the pin out from the heated end towards the other end. Repeated heating and striking may be necessary. Caution: The pin may suddenly fly out during striking; ensure no one is nearby, and the operator stands in a safe position.
If the pin has a locking ring or retainer, remove it first.
Separate the Track: Once the pin is driven out sufficiently, use a pry bar to lever and disconnect the track at the point of the shoe to be replaced.
Remove the Old Track Shoe: Take the damaged track shoe off the track links. This may require striking or prying to detach it from the link lugs.
Install the New Track Shoe:
Clean and Lubricate: Clean the new track shoe and the lug holes on the links where it will be installed. Apply grease (lubricant) to the contact surfaces of the pin and bushing.
Align Position: Align the new track shoe with the lug positions of the links on both sides. Minor adjustment of the track position with a pry bar may be needed.
Insert the New Pin:
Apply grease to the new pin (or an old pin confirmed reusable after inspection).
Align the holes and drive it in with a sledgehammer. Try to drive it in manually as much as possible first, ensuring the pin aligns with the link plate and bushing.
Note: Some designs may require installing new locking rings or retainers; ensure they are properly seated.
Reconnect the Track:
If the pin on the other connecting side was also removed, reinsert it and drive it tight (heating the mating end may also be required).
Ensure all connecting pins are fully installed and secure.
Adjust Track Tension:
Remove Supports: Carefully remove the support blocks/sleepers from under the frame.
Lower the Excavator Slowly: Operate the jacks to slowly and steadily lower the excavator back to the ground, allowing the track to make contact again.
Re-tension the Track:
Use a grease gun to inject grease into the tension cylinder via the grease nipple.
Observe the track sag. Standard track sag is typically a height of 10-30 cm between the track and the ground at the mid-point under the track frame (always refer to the specific values in your Excavator Operation and Maintenance Manual ).
Stop injecting grease once proper tension is achieved. Overtightening increases wear and fuel consumption; undertightening risks derailment.
Final Inspection:
Check that all installed pins are fully seated and locking devices are secure.
Inspect the track running trajectory for normality and any abnormal noise.
Move the excavator forward and backward slowly for a short distance in a safe area, and recheck track tension and operation.
III. Important Safety Warnings and Precautions
Gravity Hazard: Track shoes are extremely heavy. Always use proper lifting equipment (e.g., crane, hoist) or teamwork when removing or handling them to prevent crushing injuries to hands, feet, or body. Ensure supports are secure to prevent accidental dropping of the excavator.
High-Pressure Grease Hazard: When releasing tension, slowly loosen the grease nipple. Never fully remove it or stand directly in front of it to avoid serious injury from high-pressure grease ejection.
High-Temperature Hazard: Heating pins generates extreme temperatures and sparks. Wear flame-resistant clothing, keep away from flammable materials, and beware of burns.
Flying Object Hazard: Metal chips or pins may fly during hammering. Always wear a full-face shield or safety goggles.
Crushing Hazard: When working under or around the track, ensure the machine is absolutely reliably supported. Never place any part of your body in a position where it could be crushed.
Experience Requirement: This operation involves high-risk tasks like heavy lifting, high temperatures, hammering, and hydraulic systems. Lack of experience easily leads to serious accidents. Strongly recommended to be performed by professional maintenance personnel.
Manual is Paramount: Strictly follow the specific steps and standards for track maintenance and tension adjustment in your excavator model’s Operation and Maintenance Manual. Details vary between models.
Summary
Replacing excavator track shoes is a high-risk, high-intensity technical job. The core principles are safety first, thorough preparation, correct methods, and cautious operation. If you are not entirely confident in your skills and experience, the safest, most efficient, and best way to protect your equipment is to hire a professional excavator repair service for replacement. They possess specialized tools, extensive experience, and safety measures to ensure the job is completed successfully. Safety always comes first!
We hope these steps help you complete the replacement smoothly, but always prioritize safety and seek professional assistance when necessary!

For Track shoes inquiries, please contact us via the details below
Helly Fu
E-mail: [email protected]
Phone: +86 18750669913
Whatsapp: +86 18750669913
Post time: Oct-24-2025